Tumor detection
Deep learning is widely used in a variety of fields. For instance, it is used in medicine to detect tumors in magnetic resonance imaging (MRI) and X-ray scans. In fact, deep learning models can detect tumors that may be overlooked by humans. This tutorial illustrates the training of U2-Net [1] on the TCGA dataset of brain MRI scans and then uses the trained model to perform tumor detection.
Preparation
The dataset used in this case study named LGG Segmentation Dataset
which can be downloaded from Kaggle (LGG Segmentation Dataset).
The dataset contains MRI scans from 110 patients
and mask images of tumor areas in the TIFF format.
The MRI scan and mask images are named, respectively,
such as TCGA_DU_7013_19860523_32.tif
and TCGA_DU_7013_19860523_33_mask.tif.
We randomly select images from about 90% of patients for training
and use the remaining patients’ images for validation.
To prepare for training and validation,
we copy the training images and mask images into folder trains and masks, respectively;
and then copy all the validation images into folder tests.
Note that the training and mask images should be the same name under the different folders.
Here, for example, we renamed the mask TCGA_DU_7013_19860523_33_mask.tif
to TCGA_DU_7013_19860523_33.tif during the copy process.
The above dataset preparation can be performed manually
or automatically using the following shell scripts:
git clone https://github.com/biunit/JustDeepIt
cd JustDeepIt/tutorials/brainMRI

# download dataset from https://www.kaggle.com/mateuszbuda/lgg-mri-segmentation
# and put archive.zip in JustDeepIt/tutorials/brainMRI
unzip archive.zip

mkdir -p trains
mkdir -p masks
mkdir -p tests

# randomly select 90% patients for training and 10% for validation
python scripts/split_train_and_valid.py kaggle_3m .
Settings
To start JustDeepIt, we open the terminal and run the following command. Then, we open the web browser, access to http://127.0.0.1:8000, and start “Salient Object Detection” mode.
justdeepit
# INFO:uvicorn.error:Started server process [61]
# INFO:uvicorn.error:Waiting for application startup.
# INFO:uvicorn.error:Application startup complete.
# INFO:uvicorn.error:Uvicorn running on http://127.0.0.1:8000 (Press CTRL+C to quit)
We set the workspace to the location containing folders
trains and tests,
and press Load Workspace button.
Note that the value of workspace may be different from
the screenshot below depending on user’s environment.
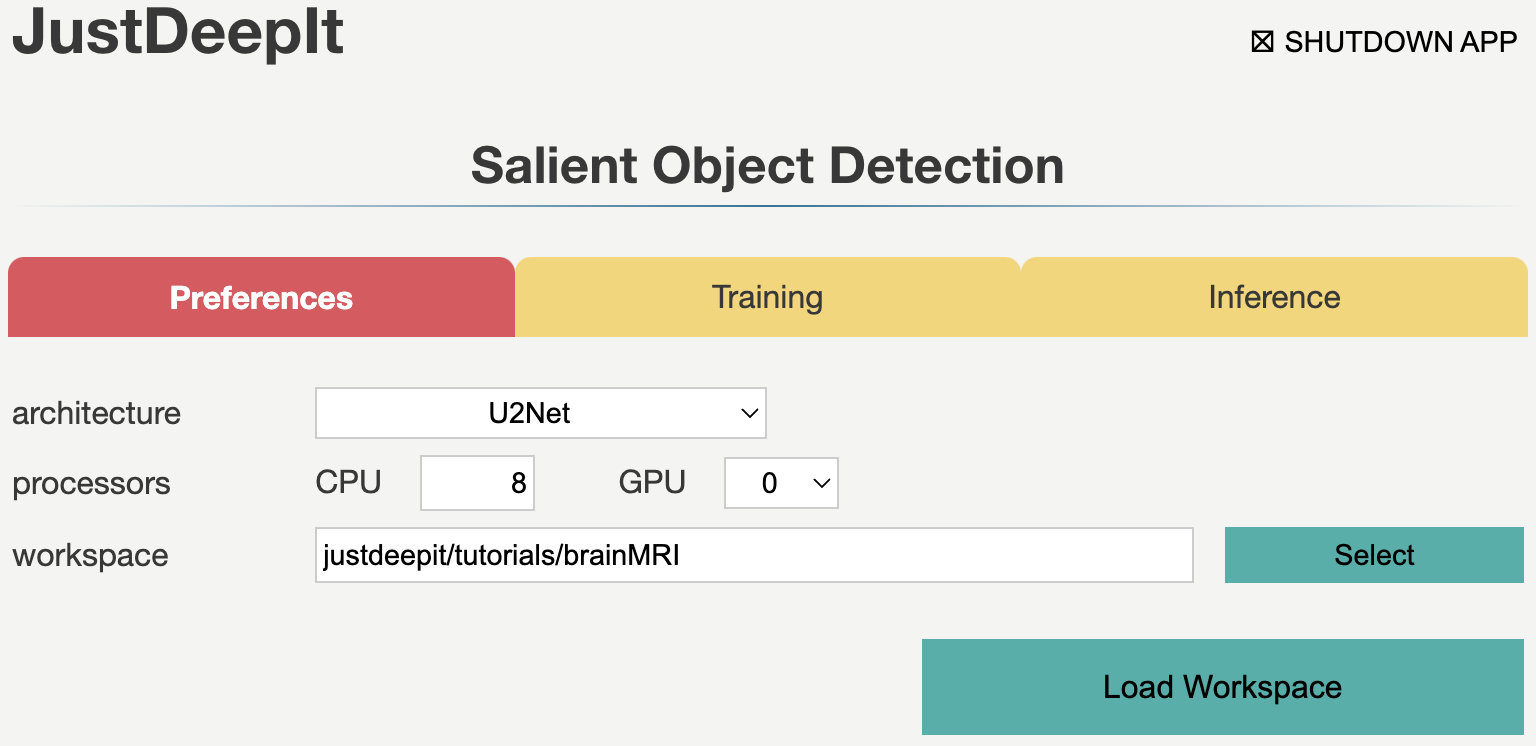
After loading workspace, the functions of the training and inference become available.
Trainig
To train the model,
we select tab Training
and then specify model weight as the location to store the training weight,
image folder as the folder containing training images (i.e., trains),
and annotation as the folder containing mask images (i.e., masks)
Note that the values of model weight, image folder, and annotation may be different
from the screenshot depending on user’s environment.
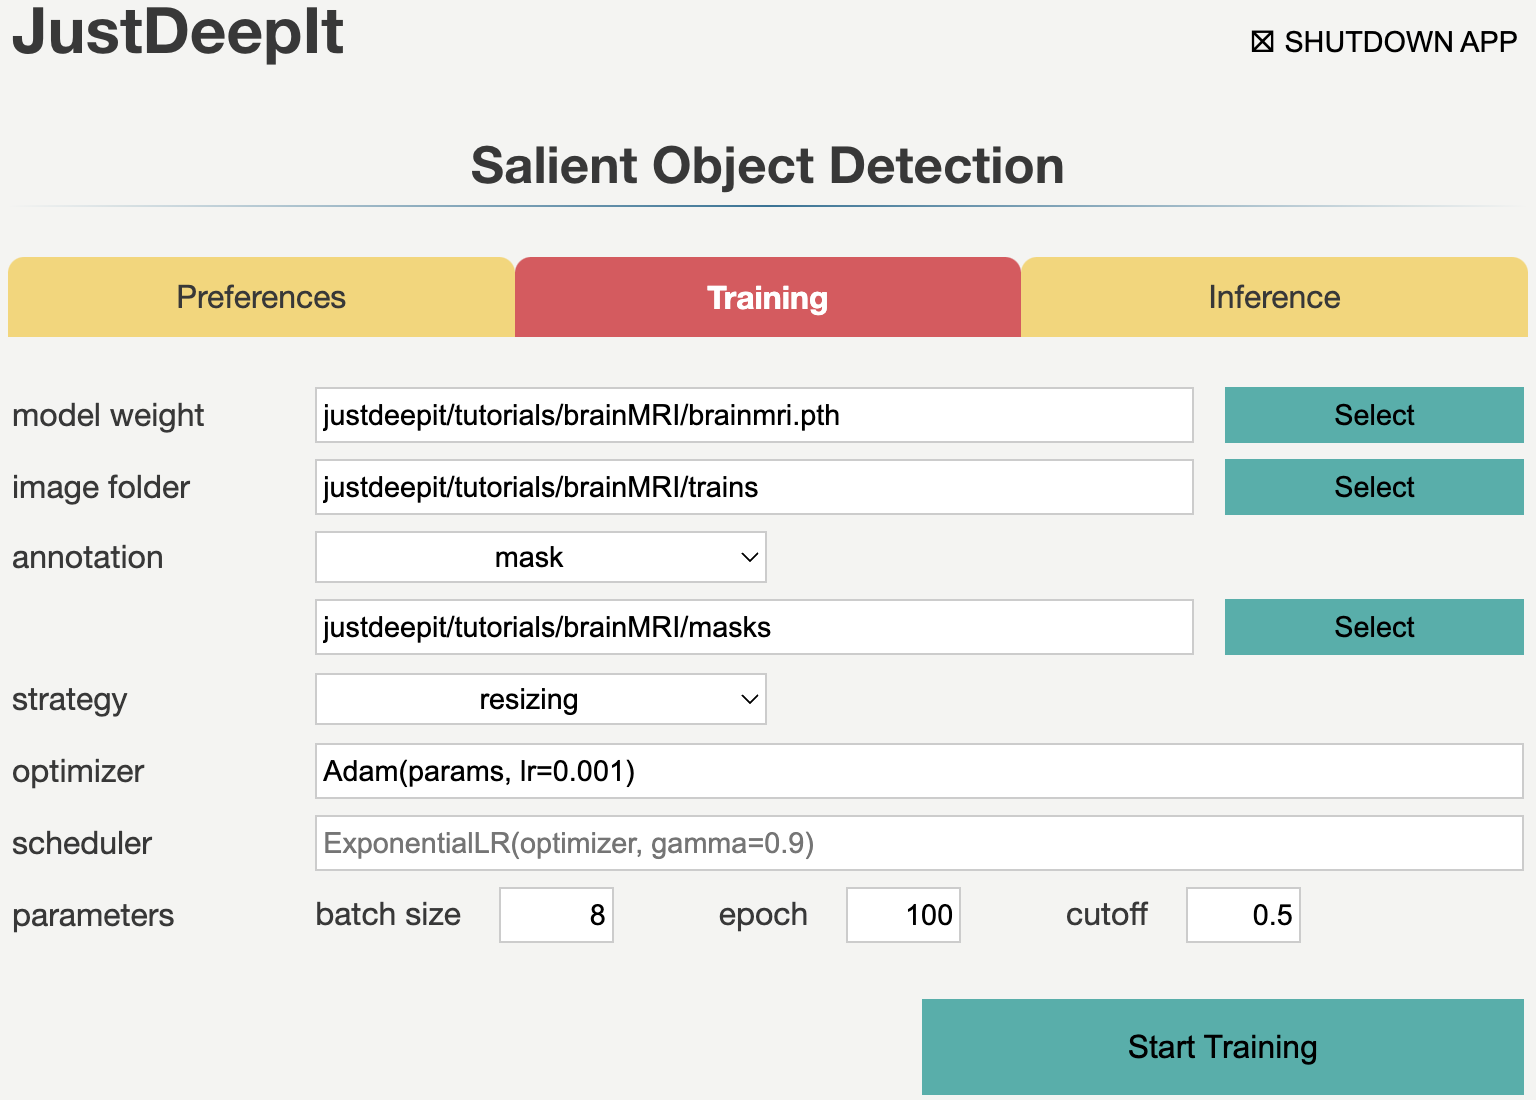
The images in this dataset have a resolution of 256 x 256 pixels which approximately equals to the input size of U2-Net (288 x 288) and each image only contains several tumor regions. Here, resizing is the suitable selection for training (see Training Strategy for details). As there are many traning images, we set a small number of epochs (e.g. 100) for training in this case. After setting the parameters as in the screenshot below, we execute model training by pressing Start Training button.
Inference
In tab Inference,
we specify model weight to the training weights,
whose file usually has extension .pth,
image folder to the folder containing images for detection (i.e., tests),
and the other parameters as shown in the screenshot below.
Note that the values of model weight and image folder may be different
from the screenshot depending on user’s environment.
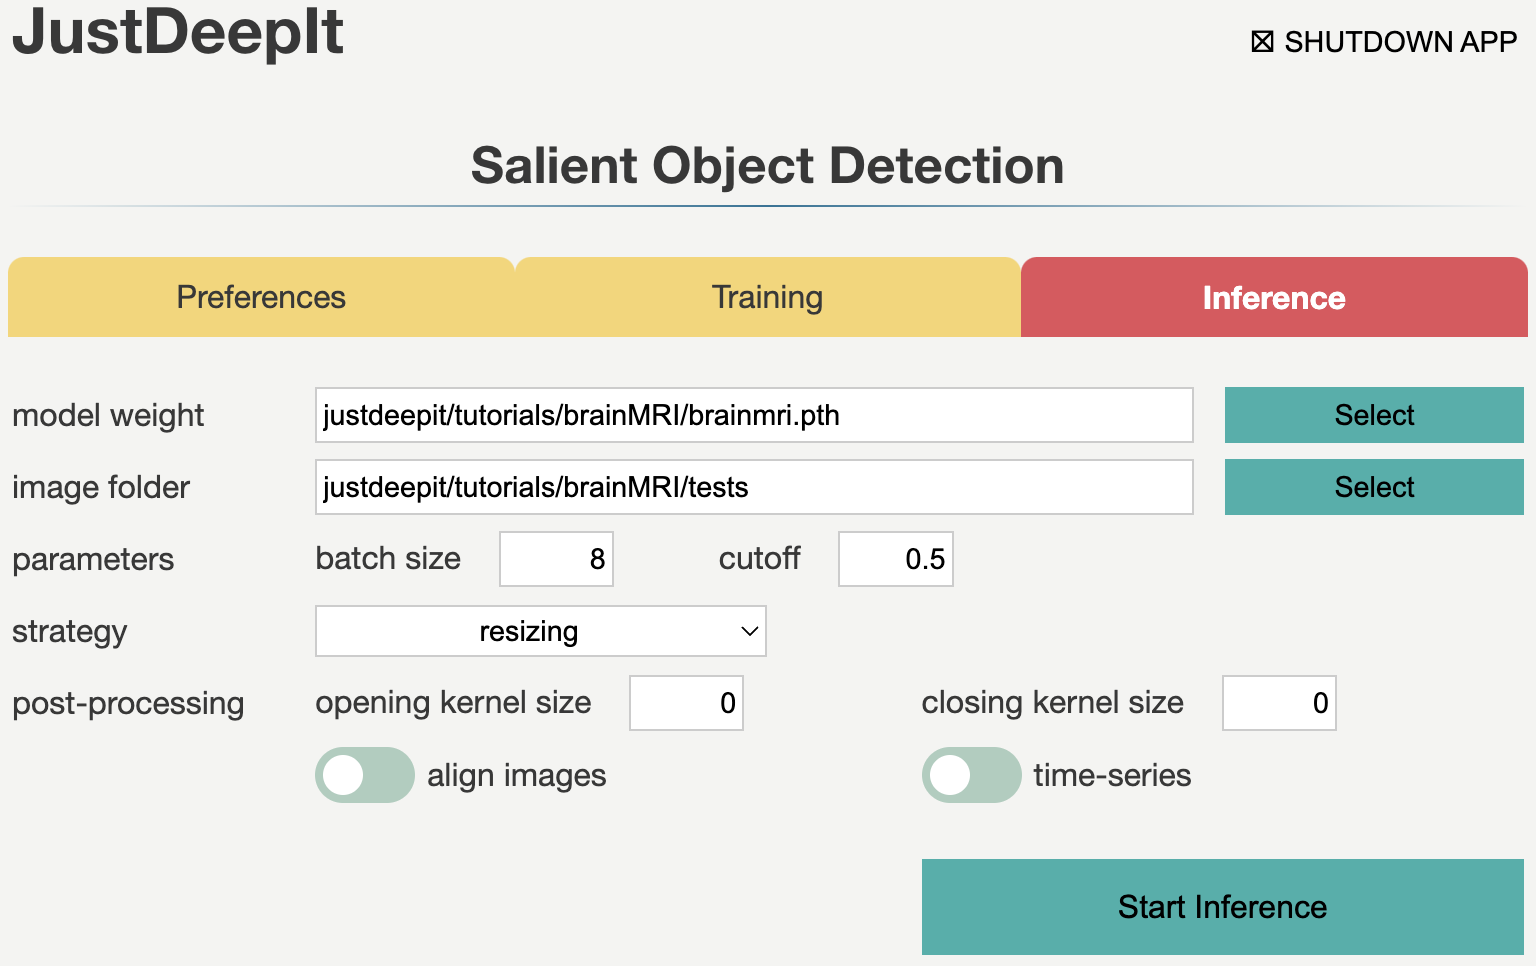
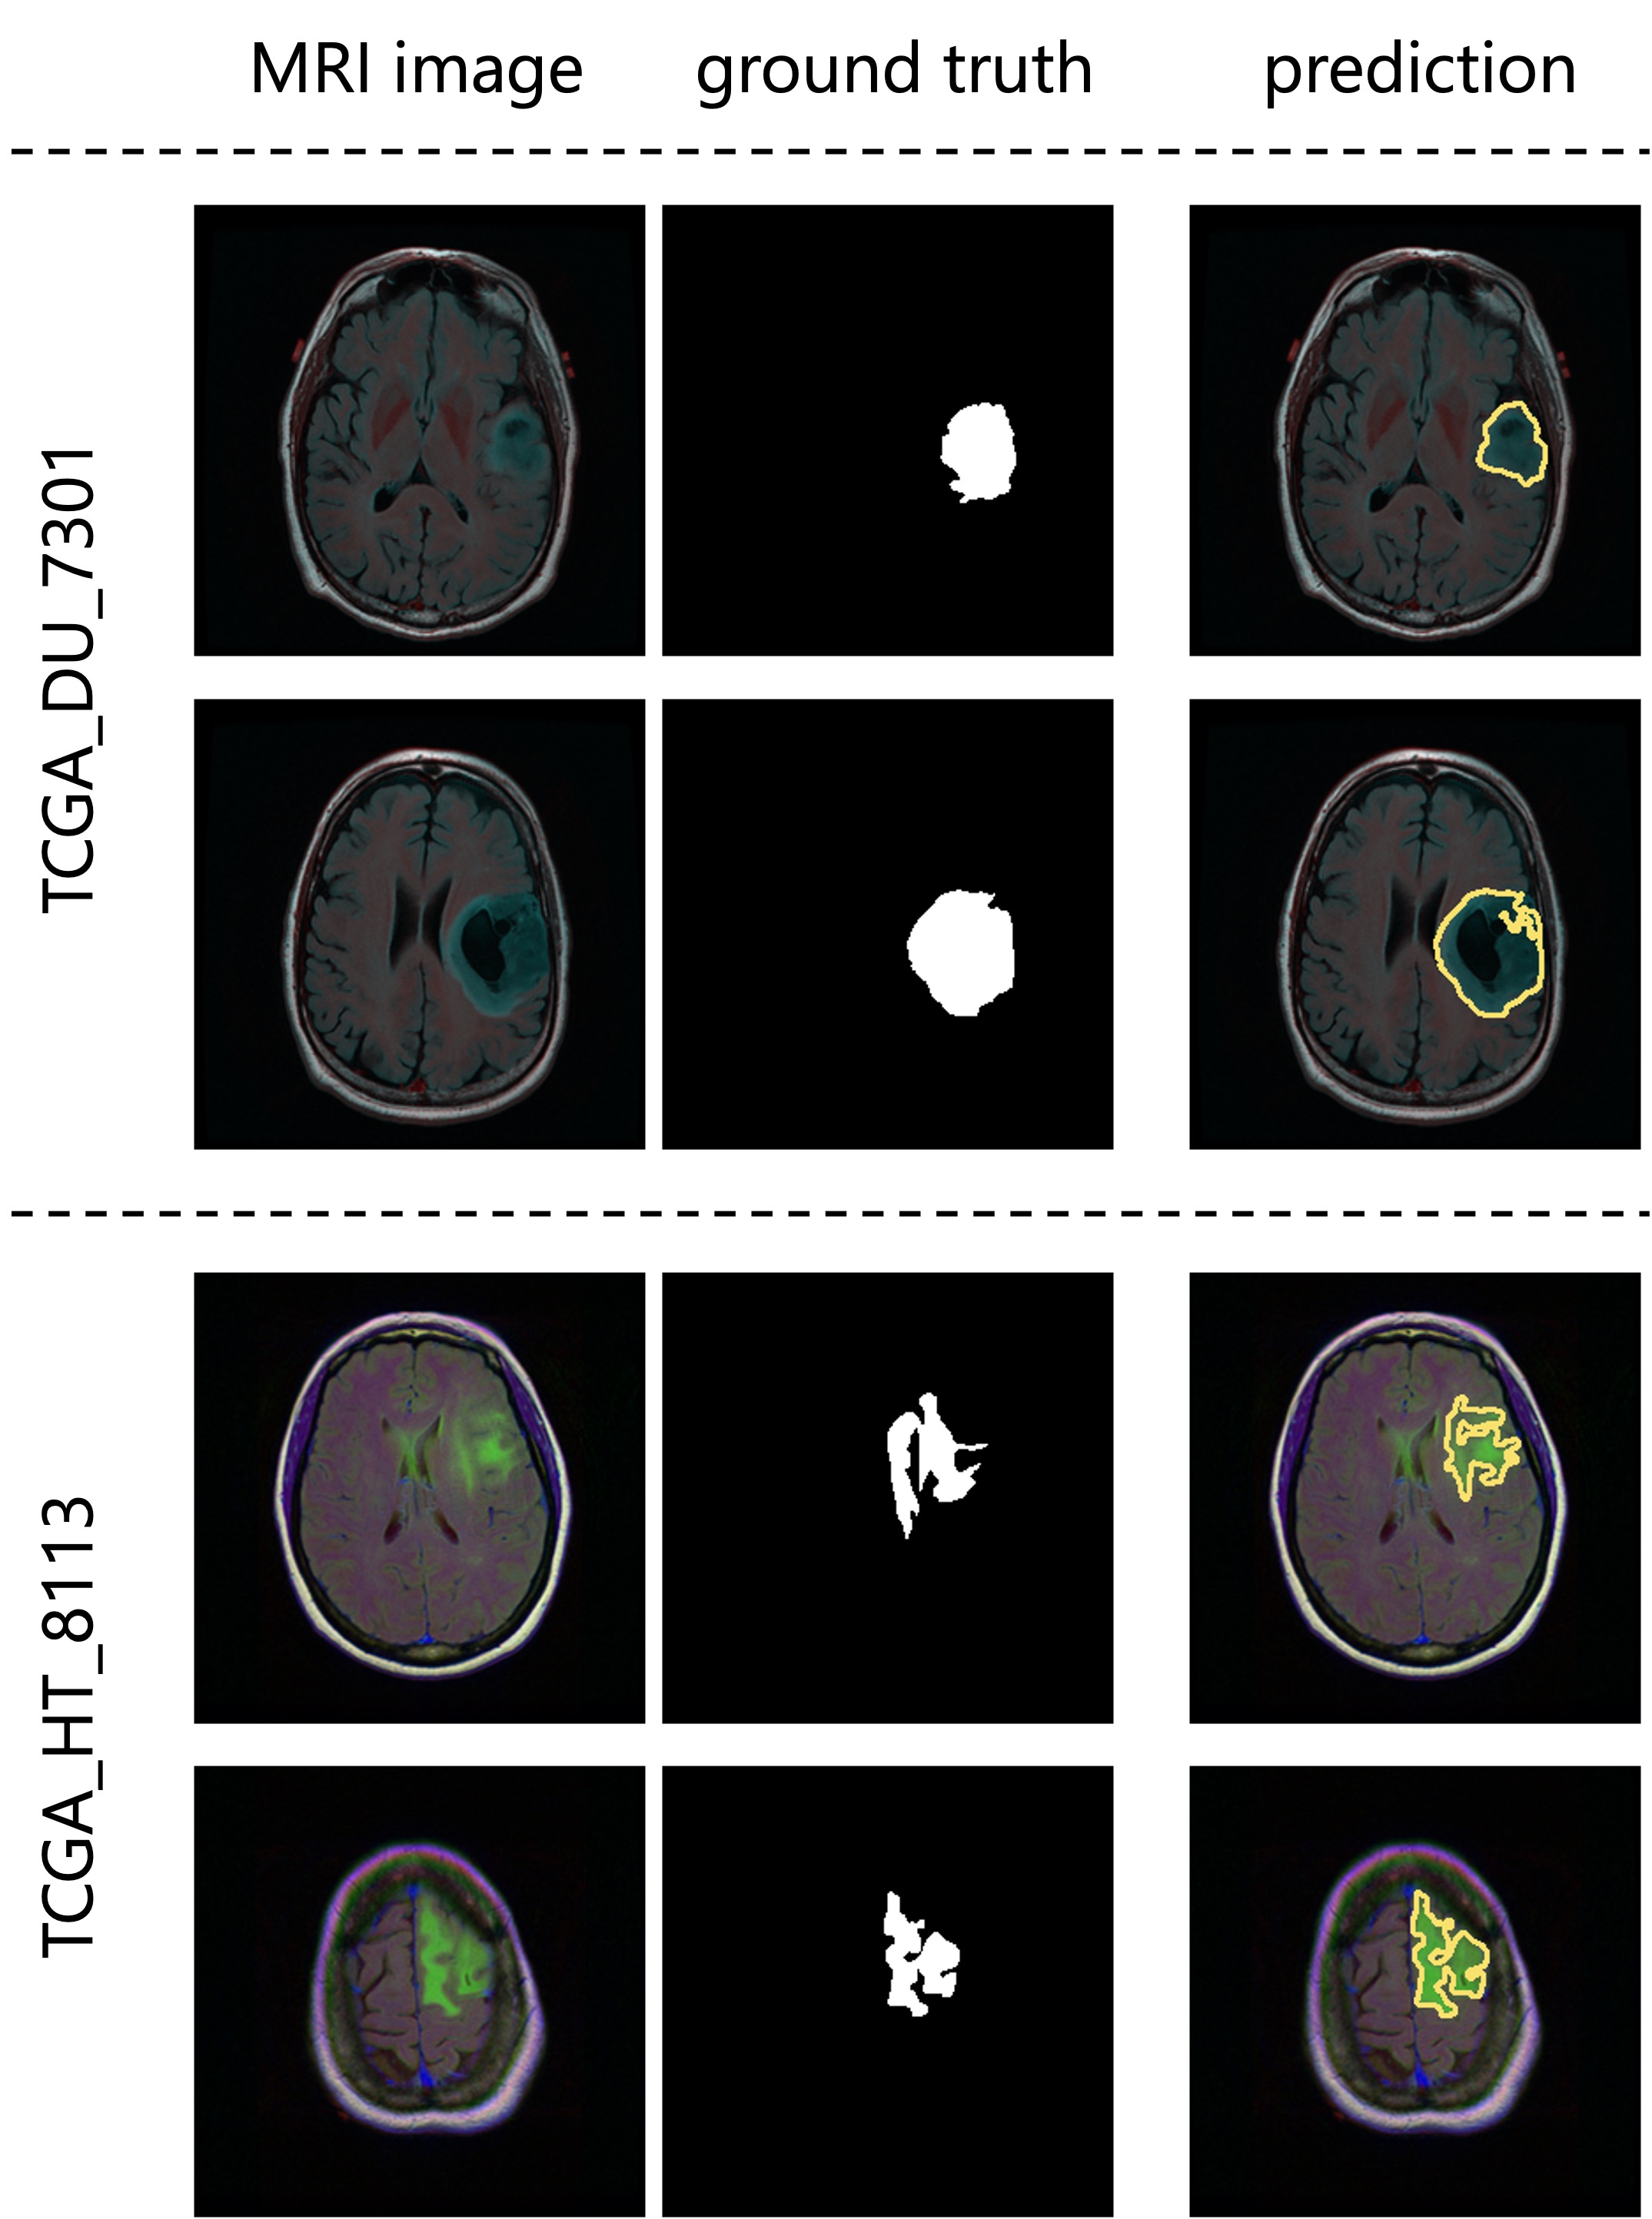
As we trained the model with resizing approach, we should use the corresponding approach, resizing, in the inference process (see Detection Strategy for details). Then, we press Start Inference button for segmentation. The results of prediction and summarization will be saved in the workspace as specified in tab Preferences. Examples of segmentation results are shown in the figure below.